The shade tree swap. lS3 e36 318ish - Part 2
Putting the engine was pretty straightforward. Both the engine arms and transmission mount fit without much issue, which is not always the case with swap kits. However, I wish there was another way for the engine arms to connect to the subframe instead of using the main control arm bolts. One area that’s a very close fit is the brake booster to valve cover clearance. At first, the engine was just grazing booster. After many hours of repositioning the engine, moving it up down and side to side as much as mounts allow. We finally realized that some e36 brake boosters have a rubber cover that is about a quarter-inch thick. Once the bottom left corner was removed, we had the minimal clearance (about 10 mm) we were looking for. After that fiasco, I tightened everything down and moved on.
Time to get the LS wired and plumbed into the e36. The wiring to get the car was straightforward. We made a harness adapter that took all of the GM harness inputs and ran them through the stock BMW x20 connector using this pinout for reference.
One thing that is not included in the E-rod kit is wiring for the starting and charging circuit. The harness does have a wire to tell the alternator to charge and the starter to start, but you have to make the main powerlines for both of those circuits along with a ground to the motor out of 6 gauge wire.
I mounted the new GM fuse box with a 3D printed bracket to the battery tray with a couple of M6 Nutserts. For the ECU, I made an adapter plate out of aluminum that allowed it to mount in the BMW ECU's stock location. I hope to 3D a cover that will allow for ventilation while still making it look a little more presentable.
For the drive-by-wire pedal that is required to be used in the E-rod kit. Instead of using the GM pedal that came in the kit because it mounts completely differently than a BMW pedal. It turns out E46 DBW pedal outputs within 3% outputs as the GM one.
Went online and got a GM pedal connector that was needed and then went to the junkyard for the e46 plug, then made a jumper harness out of both connectors. There was some slight modification to the E46 pedal mounting bracket to retrofit it in the car. The E46 lower mounting clip attaches to a bracket in the floor is at a different angle than the e36. To remedy this, we cut the clip off of the E46 mount and then glued it on the old clip off of the e36 pedal at the chassis's proper angle. I've drilled two holes through the bracket once the glue had dried and used two pop rivets just as a fail-safe to give it a mechanical connection.
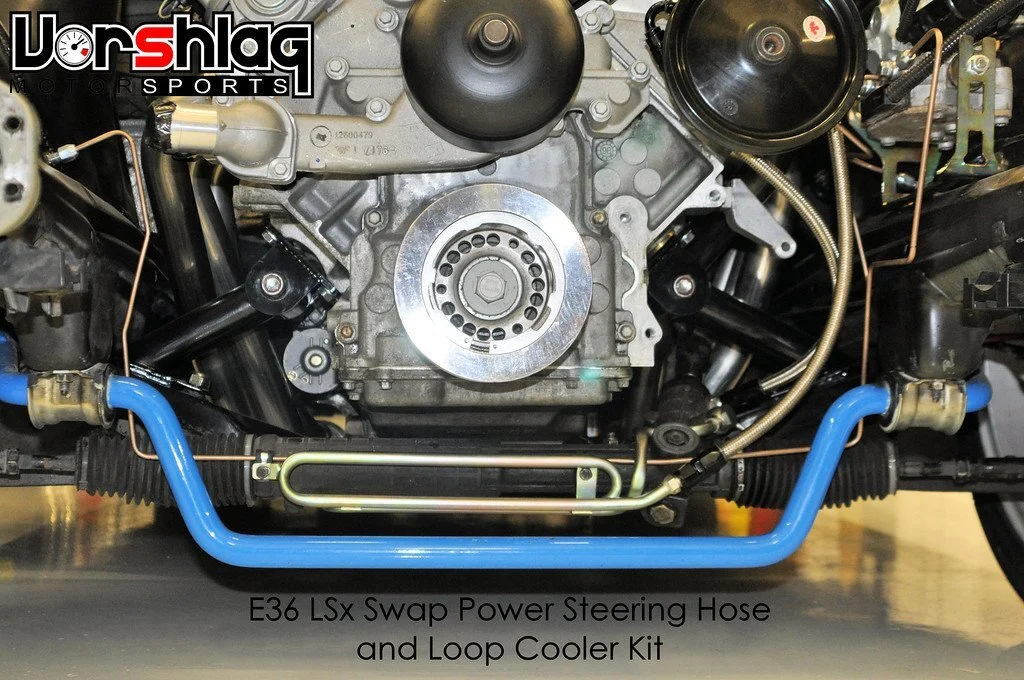
To get the CTS-V Power steering pump connected to the BMW rack, we converted all the lines to AN. We use an adapter banjo bolt on the rack and an adapter specially developed for the CTS-V power steering pump for the high-pressure side. You have to remove the power steering pump pulley to install the adapter. On the return side, Vorshlag sells a BMW power steering hard-line, sometimes referred to as the tuba with AN line fitting soldered to it. Once the AN made it back to the tank, we used Earls push-on fitting that allows you to use a hose clamp on the AN line. Next on the agenda is to get the cooling, steering linkage, and exhaust figured out!


